Did you know that 94% of first impressions are directly related to web design? Web design also includes Shopify and it’s a main factor when it comes to visitors buying a product or leaving altogether.
Shopify powers over 4 million stores globally and ranks among the top three eCommerce platforms in the United States.
Creating a Shopify migration checklist will save you time and resources.
Your online store’s move involves multiple elements such as product data, customer information, SEO best practices and rankings, and store design. Poor planning could result in lost data, customers, and revenue during the switch.
This complete Shopify migration checklist guides you through each vital step to move your website.
You’ll learn about setting migration goals, picking the right method, keeping your SEO intact, and testing your new store before launch.
Are you trying to migrate to Shopify but don’t have the time? Let us help.
Define Your Migration Goals and Scope
Moving your online store to a brand new Shopify store takes smart planning.
A solid migration strategy goes beyond moving data; it sets your business up to grow.
Experts tell us that about 80% of migration success happens before you move any data.
Why are you migrating to Shopify?
Clear reasons for your Shopify migration help you stay focused and track success.
Businesses change to Shopify because they want specific improvements, not just a “better experience.”
Here’s what makes businesses switch:
- Their current platform doesn’t work anymore and can’t handle high traffic or lacks must-have features.
- Poor performance.
- Lower costs.
- Less technical debt.
- Design restrictions.
- Better growth potential.
What success looks like post-migration
“Getting it done” isn’t enough. You should set clear, measurable goals that show your business is improving.
Good success metrics look like this:
Technical performance: Pages that load in under 2 seconds (not just a “faster site”), 99.8% uptime, and solid mobile responsiveness scores.
Business outcomes: Better conversion rates, bigger average orders, and specific revenue targets.
Customer experience: Fewer abandoned carts, better customer feedback, and less support tickets.
Operational efficiency: Better inventory control, fewer manual tasks through automation, and faster product updates.
Set a realistic timeline and budget
Migration times change based on how complex your store is:
- Simple stores with few products: 4-6 weeks.
- Medium complexity businesses: 2-3 months.
- Enterprise-level stores with custom features: 3-6 months.
Watch out for timelines that seem too good to be true. These three things often make migrations take longer:
- Data size and complexity (more products mean more time).
- Custom features beyond what Shopify normally offers.
- Third-party integrations with your other business tools.
Your budget should cover everything, not just what you pay Shopify:
- Platform fees: Basic Shopify ($39/month), Advanced Shopify ($105/month), Shopify Plus ($2,000+/month)
- Migration tools: From free CSV imports to specialized services ($100-$1,500).
- Development costs: Theme changes, custom features
- Post-migration optimization: SEO work, performance improvements.

A clear plan with goals, success metrics, a timeline, and a budget makes every decision easier later.
This preparation marks the difference between a smooth switch and a rough one.
Choose the Right Migration Method
Your Shopify migration’s success largely depends on picking the right migration method.
Each approach brings specific advantages based on your store’s size, complexity, and available resources.
Let’s get into your three main options.
Manual migration using CSV files

Store owners with simple technical skills and smaller product catalogs can use manual migration through CSV files. This straightforward approach lets you export data from your current platform as CSV files.
You format these files to meet Shopify’s requirements and import them through Shopify’s admin panel.
Who should use this approach? This method works best for stores with fewer than 500 products and simple product structures. Small businesses with tight budgets find this budget-friendly option particularly useful.
Manual migration gives you complete control over your data. You can review, clean, and organize information before importing it to Shopify. This hands-on process teaches you a lot about your store’s data structure too.
The method comes with clear limitations. Your workload increases with your store’s size, and you risk more human errors.
Manual migration only supports simple data types and leaves out customer passwords, reviews, and SEO metadata.
You also need technical knowledge about CSV formatting.
Automated tools like LitExtension or Cart2Cart

Small to medium-sized stores can benefit from automated migration tools that balance speed and affordability. These specialized tools connect your original platform to Shopify and transfer your store data automatically with minimal manual work.
Popular tools include Cart2Cart, which supports 80+ platforms with demo migrations; LitExtension, known for accurate transfers and responsive customer support; and a popular Shopify plugin called Matrixify, which handles complex data structures well.
The price ranges from $50-$500+ based on your data volume. These tools cost more than manual methods but offer valuable benefits:
- Faster transfers with fewer errors.
- Built-in data mapping assistance.
- Support for complex data, including SEO, reviews, and customer groups.
- Real-time migration monitoring.
- Demo migrations to preview results before committing.
LitExtension and Cart2Cart each offer unique advantages, though.
LitExtension bases its pricing on the number of items you migrate, so you pay only for what you use. They include free Smart Updates, Recent Data Migration, and one-time Re-Migration within 60 days.
Cart2Cart focuses on speed, accuracy, and detailed customization options.
You might need some post-migration adjustments, but these automated solutions reduce technical work compared to manual approaches.
Hiring a Shopify migration expert

Large enterprises and complex stores with custom features get the most complete solution from professional migration services. Shopify experts take care of the entire migration process, from planning and data transfer to customization and testing.
These services cost between $1,000 and $10,000+, with enterprise projects reaching $100,000+. This premium option delivers unique benefits:
Complete migration management: Experts handle all technical details while you focus on business operations. They preserve data relationships, like connecting orders to customers, that simpler methods might miss.
Custom solutions: Migration specialists tackle unique challenges and create custom solutions using Shopify’s API when standard approaches fall short.
Highest success rate: Professional services reduce risks, maintain data integrity, and provide thorough post-migration support.
Migration experts make this investment worthwhile. They have proven tools and processes that complete work accurately and quickly. Their API access gets more data than store admin interfaces allow. Many businesses report that professional migration saves time and delivers better long-term results despite higher upfront costs.
Your store’s complexity, budget, and technical expertise should guide your migration method choice. Simple stores with few products can succeed with manual CSV migration. Medium-sized businesses often do best with automated tools. Complex enterprises with custom functionality usually get the best results from professional migration services.
After choosing your migration approach, you can start preparing your data and storing assets for the move.
Prepare Your Data and Store Assets
Good data preparation is the foundation of any successful Shopify migration. This key stage helps you avoid data loss, keeps your business running smoothly, and starts fresh with clean, accurate information in your new store.
Learn more about how we reduced Rao’s Homemade average page load time by 57% with our recent case study.
Remove duplicate or outdated data
Clean data isn’t just nice to have; it’s crucial for migration success. The “garbage in, garbage out” rule fits perfectly here: clean source data creates a cleaner destination.
Take a good look at your existing store data. Look for any inconsistencies (different product description formats), mistakes (wrong pricing), or outdated details (discontinued products). Pay attention to:
Products: Get rid of duplicate listings, make description formats consistent, fix prices, and archive discontinued items.
Customers: Correct inconsistent capitalization in records, remove duplicate accounts, and update old contact information.
Orders: Move fulfilled orders past your return period to archives after saving what you need for your records.
Data cleanup helps identify what needs to migrate. You’ll see which elements matter most versus what you can leave behind. Many store owners use this chance to start fresh without carrying over problematic data.
Export product, customer, and order data
Clean data needs proper export formats that work with Shopify.
Most platforms come with native export functions that create CSV or XML files that Shopify likes.
For the sake of simplicity, we’ll use Woocommerce for this example, but the same applies to any other popular eCommerce store.
WooCommerce product exports work like this:
- Go to All Products > Products.
- Click Export.
- Pick columns and categories to export.
- Create the CSV file.
This captures key product details like titles, descriptions, prices, SKUs, inventory counts, and image URLs.
Shopify sends larger catalogs of over 50 products via email instead of browser download.
Customer data needs similar care:
- WooCommerce users should install an export plugin like WP All Export.
- Pick User/Customer from the dropdown menu.
- Add hidden fields if needed.
- Give your export file a clear name.
Customer passwords can’t be moved directly because of encryption. Plan how you’ll help customers set up new passwords after migration.
Order history exports need:
- Platform-specific export tools.
- CSV files with proper delimiters.
- All important fields (order IDs, dates, customer information).
- Clear file names for easy organization.
Check all exported files for completeness and accuracy. Make sure product variants connect to their parent products and customer relationships remain intact.
Your data is now backed up, cleaned, and exported properly. You’re ready to set up your Shopify store for the actual migration.
Set up your Shopify Store for Migration
Your data stands ready for transfer. Let’s create and configure your new Shopify store.
The way you build this foundation will affect your migration’s success and your store’s future performance.
Create your Shopify store and configure settings

Here’s how to register your Shopify account and set up store basics:
- Visit Shopify’s homepage and click “Get Started.”
- Enter your email, create a password, and choose a unique store name.
- Complete your business details, including your name and address.
- Specify what you are selling and your current revenue range.
The Shopify admin panel lets you configure your store settings.
Smart organization of your product structure should happen before importing items. You can group your products into smart or manual collections that help customers find them easily.
Smart collections add products automatically based on tags, price, or other conditions. Manual collections need you to pick specific products.
The admin dashboard under Products > Collections helps you create these organizational structures before moving your inventory.
Install necessary apps and payment gateways
Payment processing serves as your online store’s backbone. Shopify provides multiple payment options that fit different business needs.
Shopify Payments works as the platform’s native payment processor and lets customers pay with credit and debit cards. You can turn it on through the Payments page in your admin. Check your eligibility first since requirements differ by country.
Once active, customers can pay using cards with CVV numbers.
Businesses that can’t use Shopify Payments have access to more than 100 third-party credit card payment providers. Settings > Payments in your admin panel activate these alternatives. Just remember, only one credit card payment provider works at a time.
The Shopify Store Migration app helps import product and customer data from platforms like Squarespace, WooCommerce, Etsy, Wix, Amazon, Clover, and Lightspeed. This official tool supports CSV uploads from your previous platform and converts data into your store’s format.
Apps like Easy Redirects help maintain your previous platform’s functionality after migration. They create 301 redirects from old URLs to new ones. This is a vital step to keep your search rankings during platform changes.
Replicate your store design and branding
Your brand identity matters during migration. Settings > General > Brand assets help add your brand elements to keep visual consistency in your new store:
Logo implementation: Add both your default and square logos (for social media). Your logo images shouldn’t have margins or extra space around them. Extra space can make your header bigger while making your logo look smaller. Compatible themes pull these brand assets into your theme settings automatically.
Color scheme: Pick your brand colors by adding primary, secondary, and contrasting options. The picker tool helps select colors, or you can enter specific HEX color codes for exact matches.
Pick a theme that matches your current store’s layout closely. Shopify has free and premium themes you can customize to match your existing design. The theme editor helps arrange everything to match your original store’s user experience.
Add your brand slogan (up to 80 characters) and short description (maximum 150 characters). Upload cover images too (at least 1920x1080px). These elements help create a consistent look throughout your new Shopify store.
Ensure SEO Continuity During Migration
Your search rankings take years to build, and SEO preservation should be your top priority during any Shopify migration.
Poor planning could wipe out all your hard work.
Implement 301 redirects for old URLs
URL changes cause more migration disasters than anything else. Different platforms use different URL structures. A WooCommerce store might use /product/amazing-widget while Shopify uses /products/amazing-widget. Search engines will see your pages as deleted content without proper redirects.
Here’s how URLs typically change when moving to Shopify:
- WooCommerce: /product/item-name → Shopify: /products/item-name
- Magento: /catalog/product/item → Shopify: /products/item-name
- BigCommerce: /products/item-name → Shopify: /products/item-name
Setting up 301 redirects in Shopify doesn’t take much effort:
- From your Shopify admin, go to Content > Menus.
- Click View URL Redirects.
- Click Create URL redirect.
- In the “Redirect from” field, enter the old URL path.
- In the “Redirect to” field, enter the new Shopify URL path.
Stores with lots of URLs can use Shopify’s bulk import feature. Just create a CSV file that maps old URLs to new ones and import it through the URL redirects page. This saves countless hours for bigger migrations.
Make sure you test each redirect before launch. Type the original URLs in your browser to check if they lead to the right new pages.
To help you with this, here’s a video showing how to implement 301 redirections properly:
Transfer metadata and structured data
Meta descriptions don’t usually transfer on their own during migration. These short text snippets show up in search results and can substantially boost click-through rates from search engines.
Shopify lets you edit meta descriptions in these key places:
- Store title and description settings.
- Product page SEO fields.
- Blog post SEO sections.
- Page SEO settings.
Each page needs its own unique meta description with clear, simple language that gets clicks. Take time to migrate these properly since they shape how your store appears in search results.
Structured data helps search engines better understand your content. This code tells them what they’re looking at. While Shopify creates some structured data automatically, you might need extra setup for specific elements.
Monitor rankings and fix crawl errors
Keep a close eye on everything after migration. Submit your new Shopify sitemap to Google Search Console right after launch.
You’ll find this file at yourdomain.com/sitemap.xml.
Watch your rankings carefully for several weeks after moving. Look into any big drops right away. These issues pop up most often:
- Missing redirects.
- Broken internal links.
- Crawl errors blocking page indexing.
Google Search Console helps spot 404 errors or crawl issues. Fix these quickly by adding redirects or fixing internal links.
Run a full crawl with tools like Screaming Frog to catch technical SEO problems that search engines might find.
Google Analytics shows which pages need work based on their performance. Your search rankings can stay strong or even improve with careful SEO management during migration.
Test, Optimize, and Go Live
Your Shopify migration’s final phase needs thorough testing and smart launch planning. This stage ensures your store works flawlessly when customers start shopping.
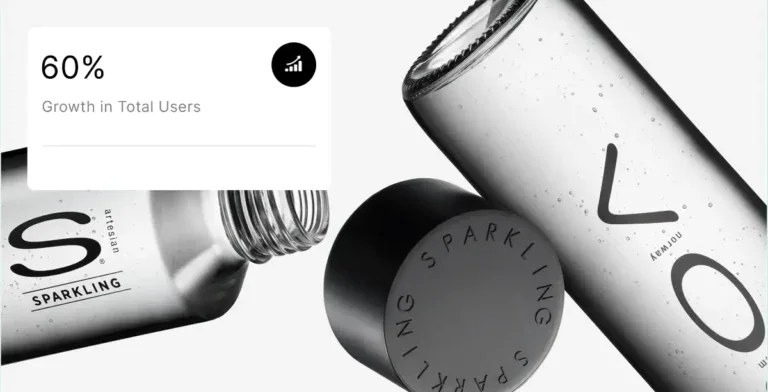
Explore how we achieved a 100 page speed score on Voss Water’s new website in our recent case study.
Run test orders and check functionality
Testing your store before launch helps you avoid problems later. You should place test orders to see your store through your customers’ eyes. This shows any issues with checkout, payments, and order confirmations that might stay hidden otherwise.
Make test orders with Shopify’s bogus gateway. This payment system is built for testing without real credit cards. Stores with paid plans can use Shopify Payments’ test mode as another option.
Your testing should look at:
- Browsing products and collections
- Adding items to cart and modifying quantities.
- Completing the checkout process (for both guests and accounts).
- Making sure order confirmation emails arrive.
The store should work well on all devices (desktop, mobile, tablets) and browsers (Chrome, Firefox, Safari, Edge).
Connect your domain and update DNS
Your domain needs DNS record updates through your domain provider to point to Shopify. These records need changes:
- A Record: Point to Shopify’s IPv4 address (23.227.38.65).
- AAAA Record: Point to Shopify’s IPv6 address if supported.
- CNAME Record: Set “www” to point to shops.myshopify.com.
DNS changes typically propagate within a few hours but might take up to 48 hours to finish completely. You can check the progress with online DNS checker tools.
Monitor analytics and customer feedback
Your store’s performance needs tracking through Shopify Analytics and Google Analytics after launch. Keep an eye on conversion rates, bounce rates, and average order values.
Here’s a video showcasing how to increase conversion rate on Shopify:
The first 48 hours after launch need extra alertness. Think of this as your store’s warranty period. Look for unusual patterns in traffic or conversion rates that might show underlying problems.
Ask customers to report issues through post-purchase emails or on-site surveys. Their feedback often reveals problems that technical monitoring misses. Quick responses to issues help build trust in your newly migrated store.
Migrate Your eCommerce Store to Shopify Hassle-Free With Blacksmith
Moving to Shopify is the most important step to scale your eCommerce business and capture your share of the growing online retail market. But migrating all your products in a safe and efficient way can be complicated.
The bigger your inventory, the longer and more complicated your process becomes; this is without even adding other important aspects of an eCommerce store, such as SEO. A complete eCommerce migration can take weeks or even months, depending on inventory size and Shopify knowledge.
This is time that you could use for other areas of your business, such as marketing, product development, and even advertising. So what now?
That’s where we come in. Here at Blacksmith, we’re eCommerce experts with dozens of different Shopify stores under our belts.
As a professional Shopify development agency, we have a group of team of Shopify specialists, ready to migrate and improve your Shopify store with all the latest strategies and trends that best suit your industry.
Still unsure if migrating to Shopify is the right choice for your business?
Don’t worry, click here to schedule a call with us and we’ll provide you with a free website and business audit. This will help us show you the areas where your current eCommerce store might be losing sales and how a new Shopify store can fix it.


